
Best AIP Bacon Recipe: How to Make Your Own Delicious, Paleo-Friendly Bacon
Yes, there is such a thing as AIP bacon! Just because we are following the core Autoimmune Protocol elimination diet or strict Paleo, doesn’t mean we can’t have bacon.
This homemade AIP bacon recipe is super easy to make! You will never want to buy store bought bacon again!
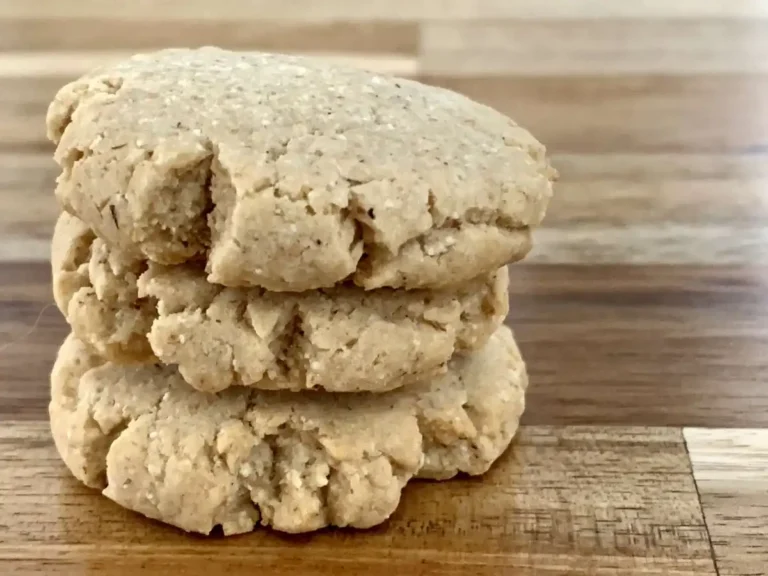
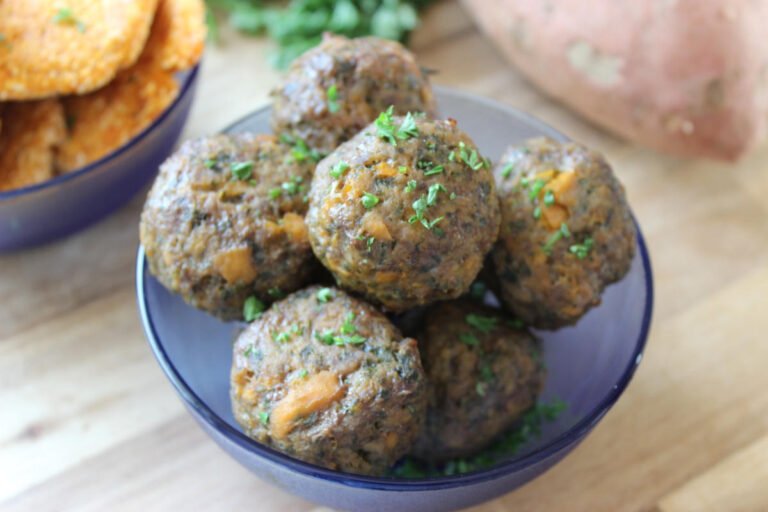
I don’t need to tell you what bacon pairs well with, because you probably already have your favorites. But just in case you are looking for some AIP breakfast recipe ideas, check out my sweet potato patties and sautéed mushrooms and zucchinis as some options.

Step-by-Step Instructions for Making Paleo and AIP Bacon
Before you start
Somethings to bear in mind before starting are storage and processing. We portion and vacuum pack for freezing but normal ziplock bags can also work provided you get as much air out of them as possible before freezing in order to prevent freezer burn.
Another thing to keep in mind is the timing. Work back from when you have time to cook or smoke the bacon. You will want to start curing the bacon 7 or 8 days before then.
Keep in mind the storing of it. Cutting up the bacon can take a bit of time, depending on how you decide to cut it (by hand or with a meat slicer).
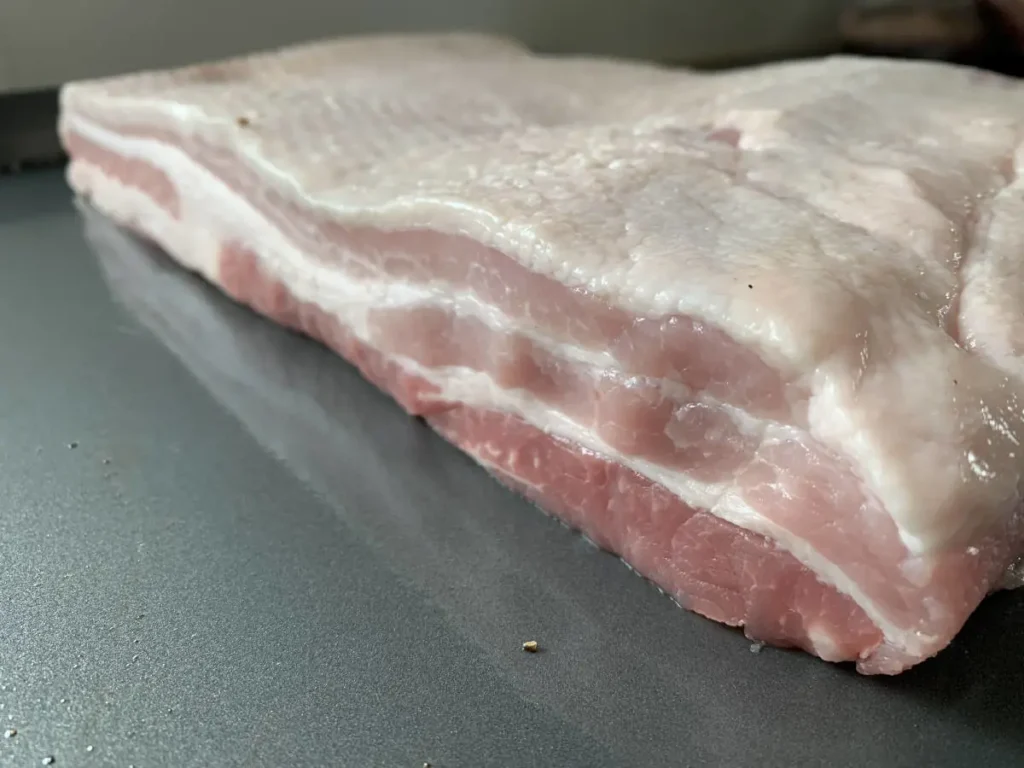
Select your Pork Belly
Select a nice piece of skin off pork belly. Try to choose a piece that is of even thickness with the most amount of meat. Pork belly will however always have a lot of fat.
We chose a full belly and cut it into 3 similar sized pieces for this cook as it was more cost effective to buy this way and it allows for smoking more bacon at the same time saving both time and charcoal.
I would recommend trying this out with a single smaller piece first so that you can dial in the amount of sweetness and smokiness to your liking, before doing a complete belly. If you decide to do a small piece try to get the centre cut.
Hormone free, free range pork would be best, but budget does not always allow this. Try to find pork that fits your budget, but is also the best quality you can get.
Important Note
For the recipe there is only 1 thing that is not variable and that is the amount of salt. It should be 2% of the weight of meat. That is what is required for curing. If you do this you will not need to add pink curing salt, nitrate or nitrite.
Everything else is going to be adjustable to your preference to suit your pallet.
If you find it too sweet or maply, or not salty enough add a little less maple syrup. If it’s not sweet enough or seems too salty, add some more maple syrup. But stick to the 2% salt!
Start with this recipe and then adjust it each time you make a batch until you have it dialed in to your preference.
If you can tolerate black pepper, it is a great addition, but is absolutely not necessary. Beyond AIP, if you can tolerate it, you can add other spices too, such as chilli flakes, paprika, herbs. But AIP bacon with only salt and maple syrup is just as delicious!
To start:
Wash your hands, clean the sink, have kitchen paper on hand and have a tray to work in (non reactive to salt). We generally use a baking sheet/cookie sheet.
Remove the pork belly from its packaging and rinse it well under cold water.
Pat it dry with kitchen paper.
Next:
Weigh each piece of pork belly separately. Weigh out your curing ingredients for each piece individually and get your ziploc or other container ready.
Then:
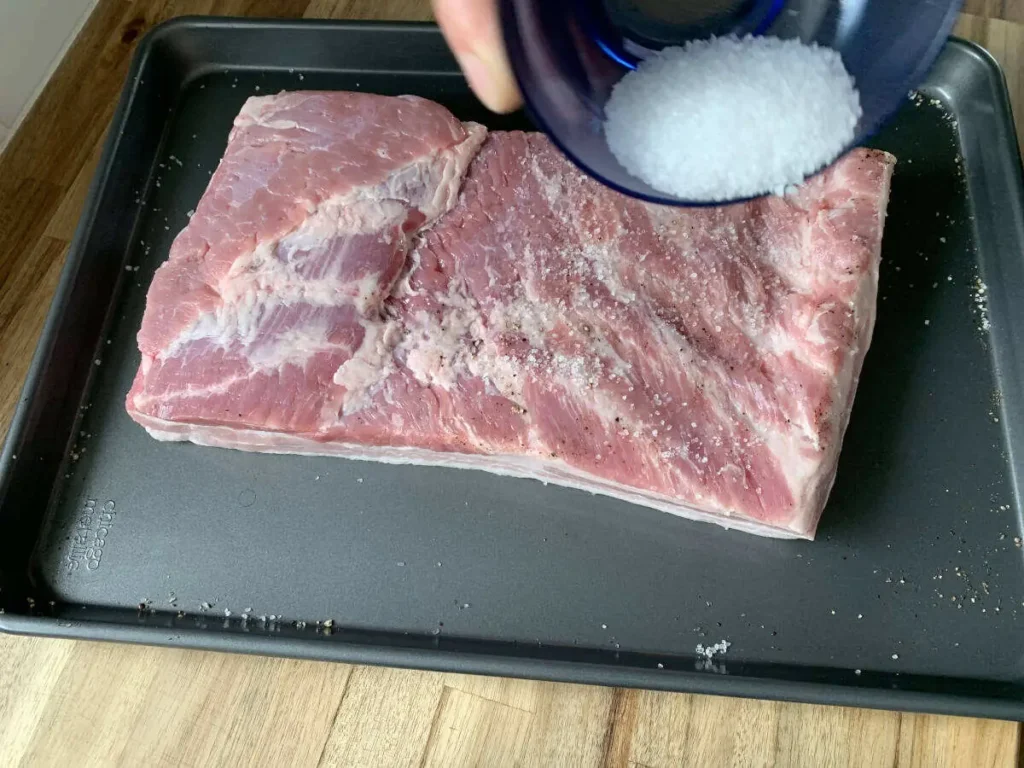
Sprinkle the salt all over the pork belly as evenly as possible without being overly OCD about it. After this you can sprinkle whatever other dry ingredients you are using over the meat, this could be pepper, thyme, rosemary, etc.
Now:
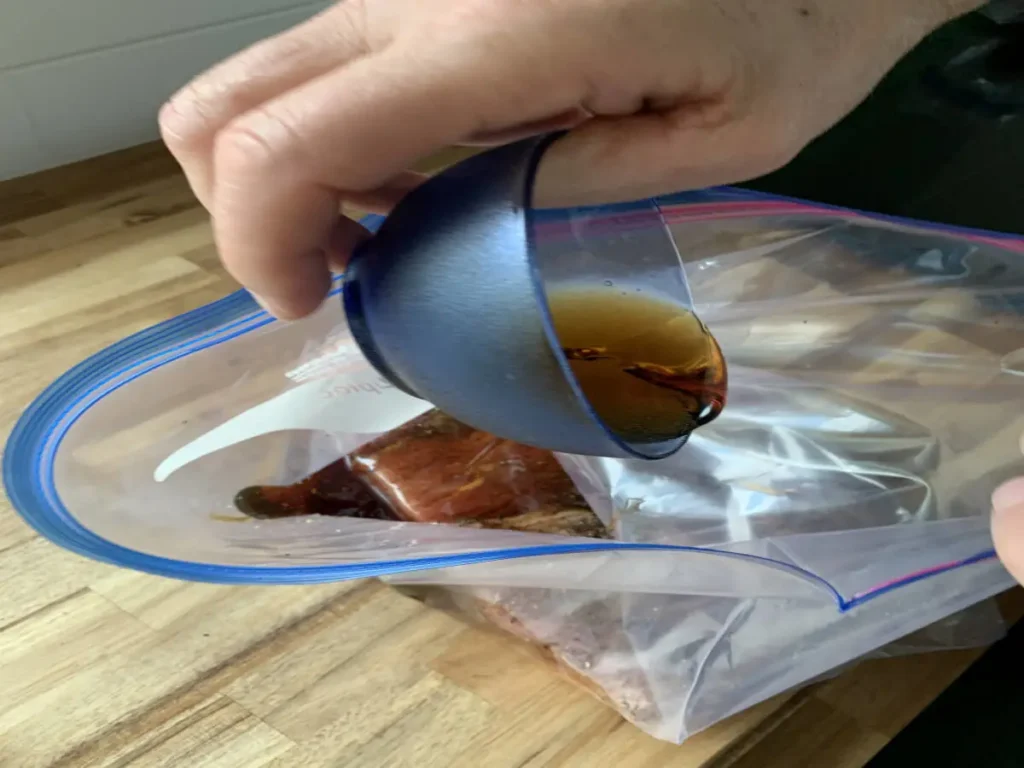
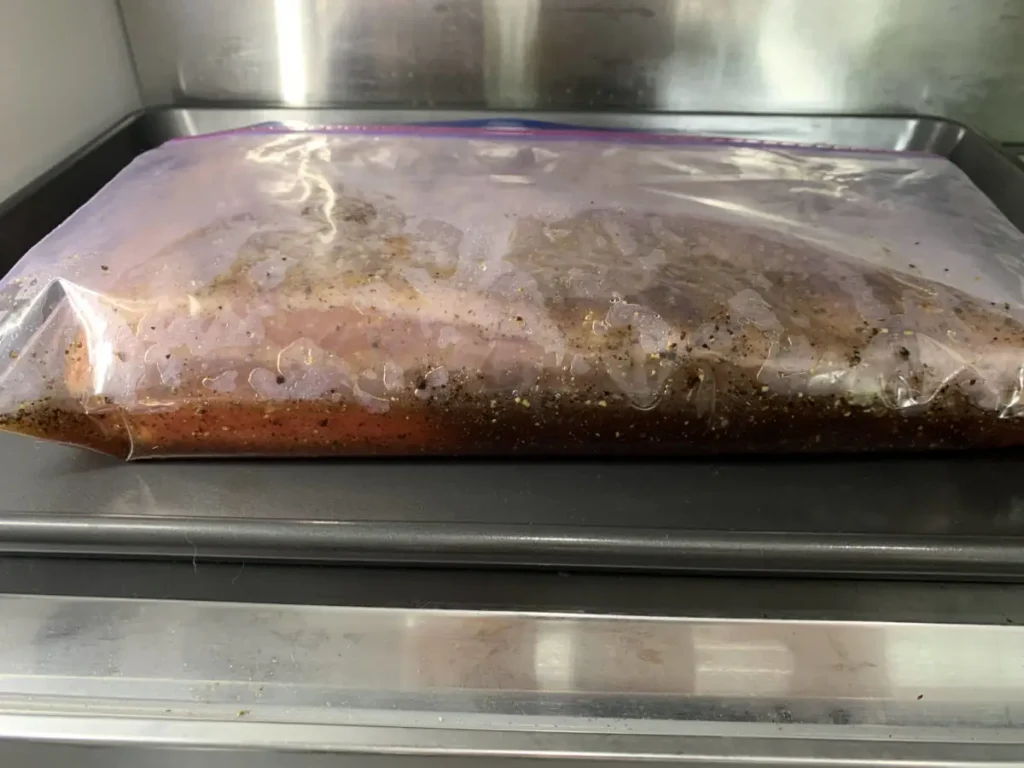
Place the pork into the bag or container and add all of the salt that did not adhere to the pork. You must have the full 2%! Then pour in the maple syrup and massage the bag to spread it all over the meat.
Remove as much air from the bag as possible and then close it.
If you are using a different container, place the meat in the container with all the salt, pour over the syrup and roll the meat over a few times to get full even coverage. Cover or close the container.
The curing process now begins!
Place the belly (soon to be bacon) in the fridge and flip it over once or twice a day for the next 7 or 8 days.
We like to use a bag as it seems to give better surface coverage. We place the bag on a rack (forgot to add it in the picture) as this allows liquid to be in contact with more of the meat because it pools between the bars. To be safe, put it on a clean baking sheet in case anything leaks.
What to expect:
The salt will draw moisture from the meat, you will notice quite a lot of liquid in your bag or container.
The salt is then drawn back into the meat cells via osmosis, penetrating deeper and deeper with time.
After a few days the meat will change color becoming more grey and becoming firmer.
Cooking or smoking the bacon
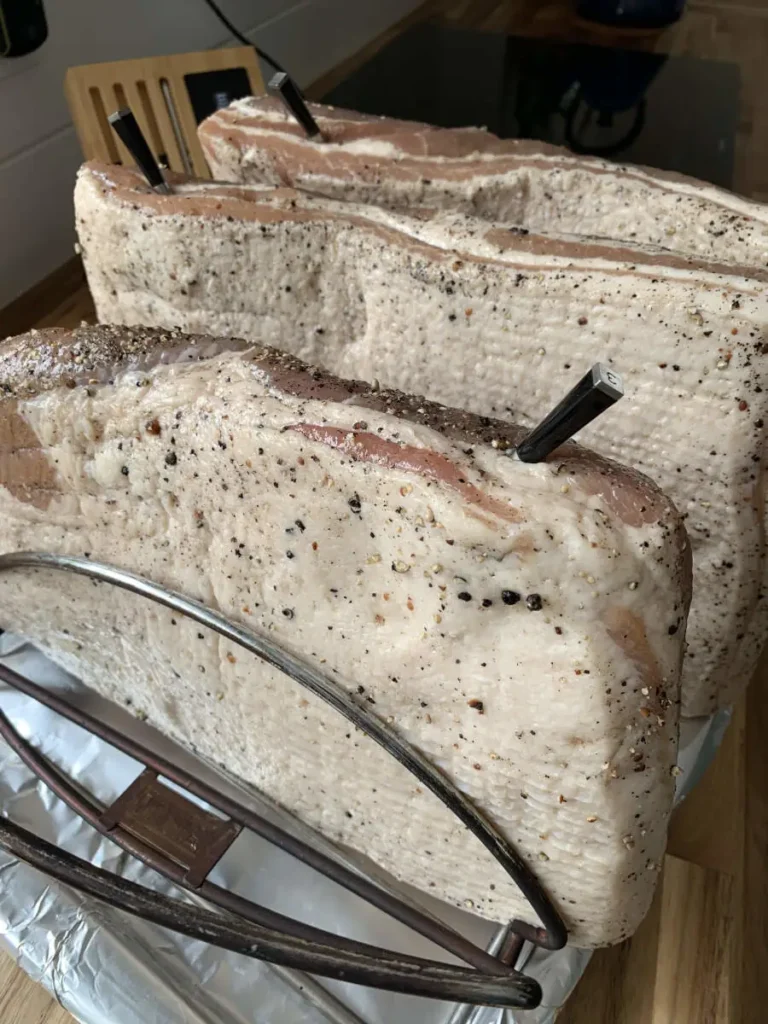
After a week or a little longer, again with clean hands, sink and a tray with a rack, remove the meat and rinse it.
Some if not most of the pepper and or herbs will rinse off, that’s ok as the flavor has already transferred to the meat. It is nice to try and leave some on though.
Pat the pork dry with kitchen paper and transfer it to the rack.
You can smoke or cook the bacon at this point. If you are planning on smoking the belly, it is better but not necessary, to leave it uncovered in the fridge until the next day.
This allows the surface to dry allowing better smoke penetration.
If you left it in the fridge overnight, remove from the fridge about an hour before cooking or smoking.
If cooking in the oven, set the oven to 250°F (120°C) and let it come up to temperature.
Place the meat on the rack over a tray into the middle of the oven with a temperature probe if you have one. It is important to use a tray below the meat as a lot of fat will render as the pork cooks. You can use this fat for frying or sautéing other food.
Let the bacon come up to an internal temperature of 150-155°F (65-70°C).
Remove from oven and allow to rest and cool.
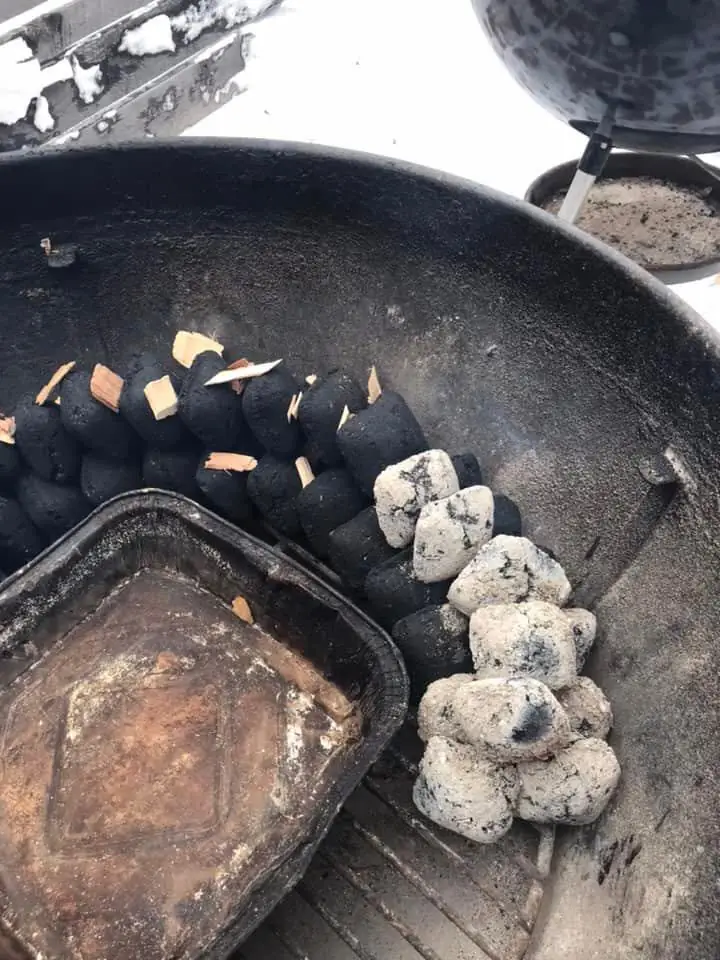
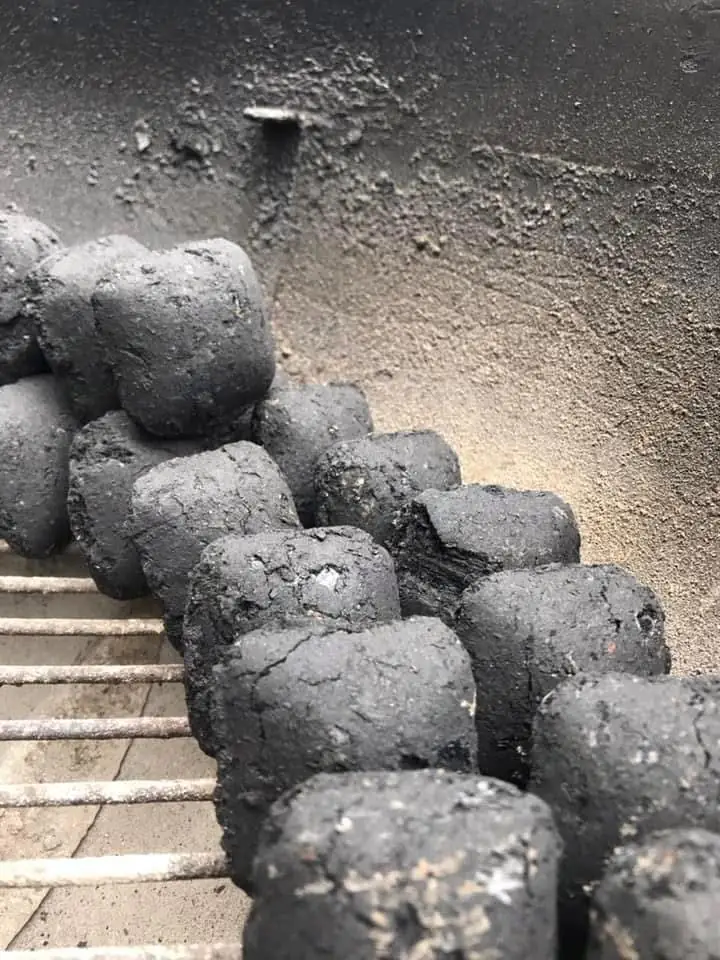
If smoking, set up your grill for indirect heat at a temperature of 250°F (120°C). We prefer the BBQ snake method for our Weber kettle grill as it keeps a consistent temperature for a long time.
Add some wood chips or chunks and let it come up to temperature. We like to use hickory or apple, or a combination of both.
Don’t go too overboard with the wood, a little goes a long way. It is better to have a slow supply of clean smoke than a whole lot at the same time as this will become bitter and or sour! I explain the use of wood chips and wood chunks in a bit more detail where I explain the BBQ snake method.
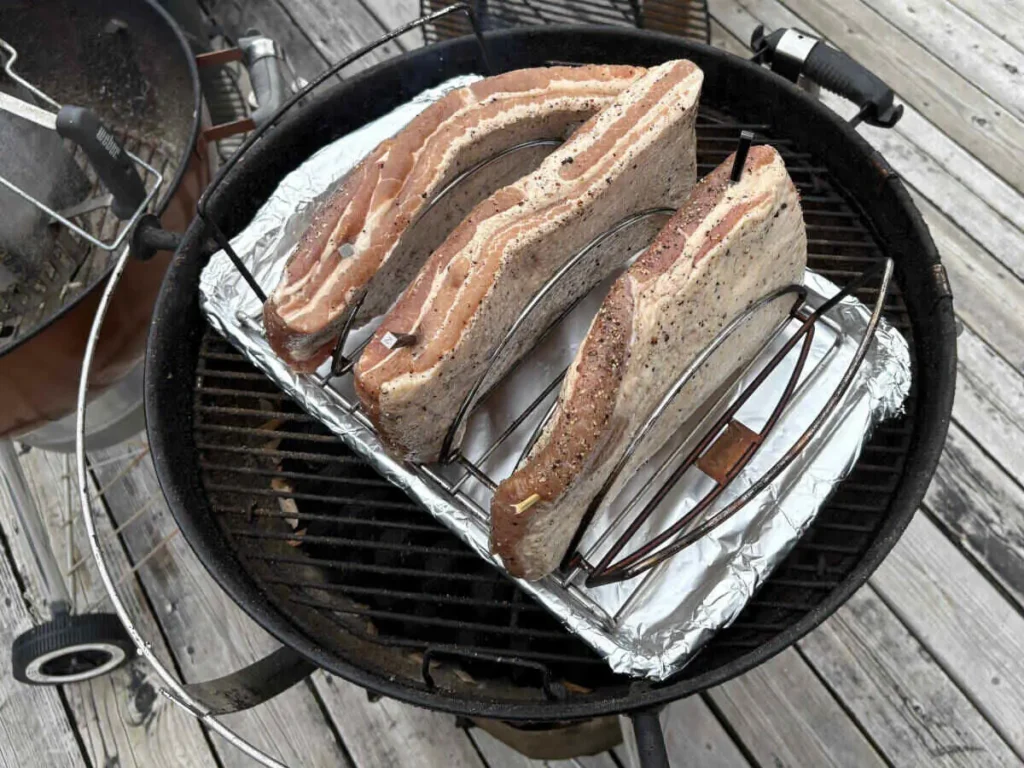
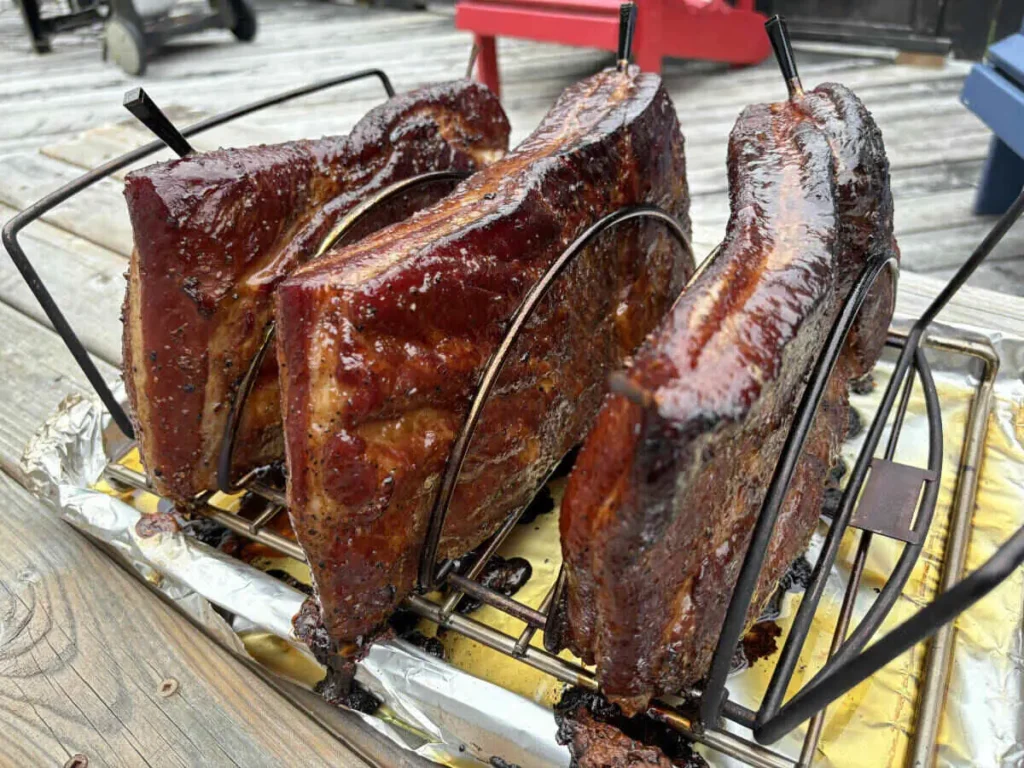
Once burning clean and up to temperature add the bacon. We prefer to use a raised grid in a tray for 2 reasons, firstly it provides a second barrier against any direct heat and secondly it catches all the rendering fat. If this drips into the grill it will create a big mess and the potential for flare ups.
The meat can lay down flat if you have enough space on the grid, we use a rib rack to stand it up as 3 pieces will not fit any other way.
Again, use a temperature probe if you have one. We love our wireless Meater®, but other thermometers will do the trick!
Allow the meat to come up to temperature (150-155°F or 65-70°C) then remove from the grill and let it rest and cool down.
Avoid taste testing if at all possible as this could lead to eating half the bacon! That said, a few thin slices when the bacon is still slightly warm is amazing!
Well done! You have made the best AIP bacon you will ever eat!
Storage
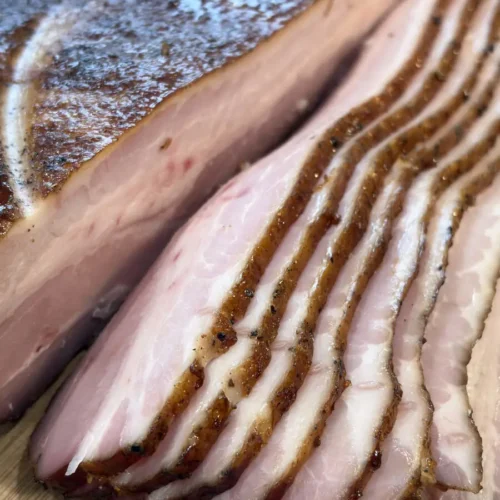
We usually cut some thick and some thin for variety.
Slicing up a whole belly by hand takes a few hours. A deli/meat slicer will reduce the time considerably but you will have to do a proper cleaning afterwards as everything will be fatty!
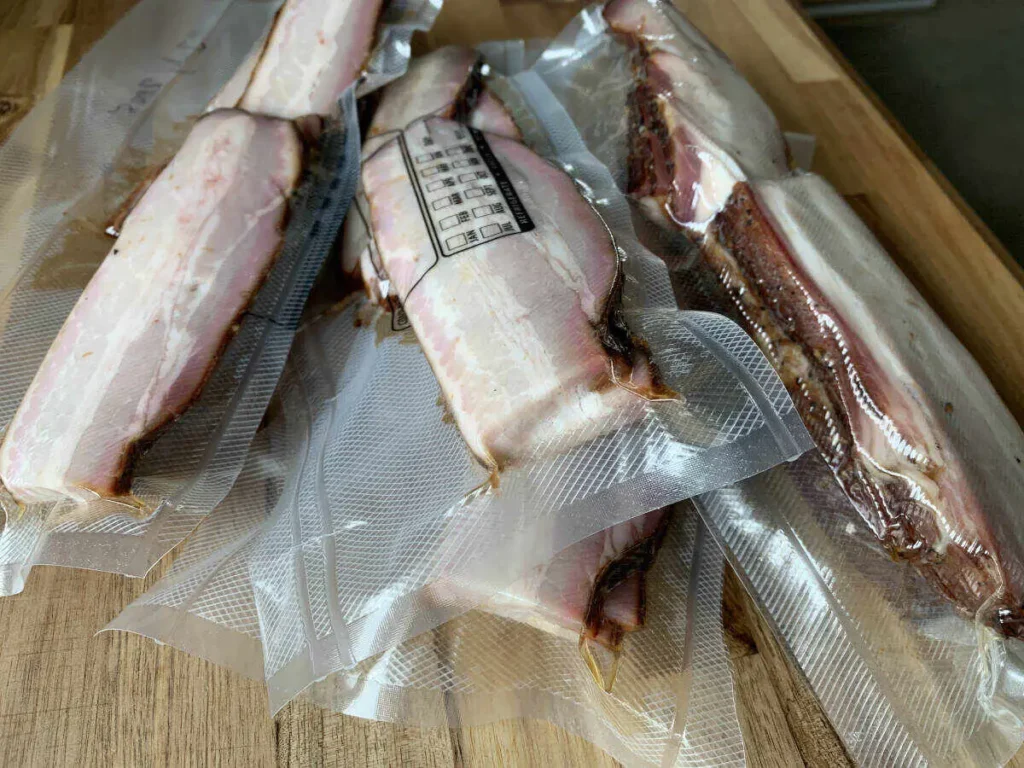
You can leave the bacon in the fridge and process it piece by piece over a few days if you prefer. It does however slice easier at room temp. We let it cool down after smoking and then slice and pack it before refrigerating and or freezing.
We have also left a piece whole in the fridge to slice before frying, this is a great way to show off if you have guests for breakfast. Nothing like a fresh custom cut piece of bacon to start the day! Slice and pack as preferred.
The end of each piece that is difficult to slice can be diced up and frozen for later use. Think ground beef dishes, mushrooms and brussel sprouts.
Fry or cook as you would any other bacon.
Keep the fat each time to use for frying or sautéing for other meals.
I would say put a slice of bread in the pan and fry it to golden brown, add a drizzle of maple syrup and enjoy! But I haven’t found a good AIP bread recipe yet!

But don’t you have to use curing salts?
No you don’t! Salt and smoke have been used for preserving and curing meat for centuries.
We have been making bacon this way for a few years now, and have never used curing salts. We have never had an issue with our bacon and it lasts quite some time.
For prolonged storage, vacuum seal and freeze the bacon.
To prevent possible bacterial growth, make sure you keep your work surfaces clean and keep the meat cold before and during curing.
Curing salts contain sodium nitrite and some also have sodium nitrate, as found in most processed foods. These have been associated with some health issues. And being on AIP or Paleo, we want to avoid additives such as these as best we can.
Don’t keep it to yourself!
I would love it if you shared this AIP bacon recipe with your friends and family! And please tell me what you think of this recipe. I know this recipe can look a bit daunting, but it’s actually very easy, you will never look back!
If you make it, take a pic and share it on your Instagram and tag me (@thyme.and.balance). Let’s inspire each other to keep AIP exciting!
AIP and Paleo Bacon Recipe
Equipment
- Baking sheet
- Grid to place over the baking sheet
- Rib rack if cooking or smoking more than one piece at a time
- kitchen scale
- Large Ziploc bags or Freezer bags or non reactive container with lid
- Thermometer
- Vacuum sealer to package and store bacon
- measuring cups and spoons
- Paper or kitchen towel
- If smoking: kettle grill, charcoal and wood chips or other smoker
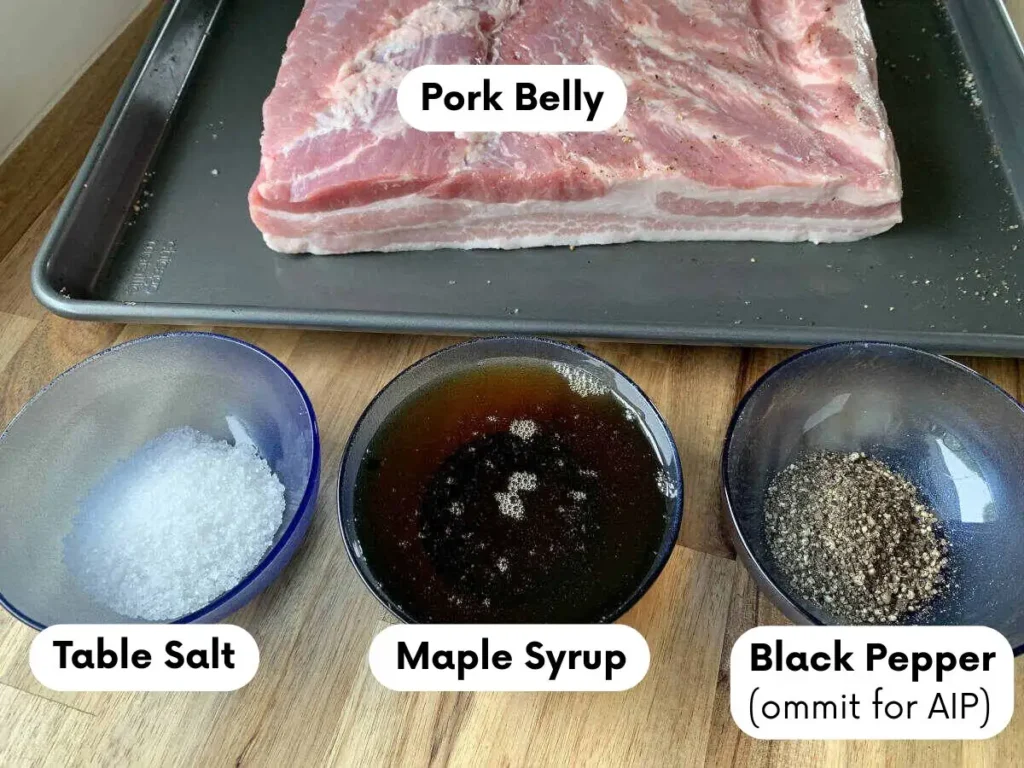
Ingredients
- 2 kg Pork belly
- 40 g Table salt – this HAS to be 2% the weight of the pork belly
- 1 cup Maple Syrup (½ cup per 1kg or 2lbs of belly)
- 2 tablespoons Black Pepper – ommit for AIP (½ tbsp per 500g or 1lbs of belly)
Instructions
- Note: The recipe works on ratios, so you can easily adapt it to the size of your pork belly. This example uses one single piece of pork belly of 2kg. Important is that each individual piece of pork belly gets 2% in weight of salt added to it. Everythinng else can be adjusted to personal taste.Cook time is approximate and only a guide. The internal temperature of the pork will be your true guide as to when it is cooked.
Preparation
- Clean your hands, the sink and work station.
- Cut your pork belly to a size that you can work with if it is too big. We like to work with pieces no larger than approximately 4lbs or 2kg.
- Rinse the pork belly and pat dry with paper towel.
- Weigh each piece of pork belly. For each piece of belly, measure out 2% in weight of salt. Table salt or himalayan salt.
- Measure out your maple syrup and set aside. Approximately 1/2 cup per 2lbs or 1kg.
- If you tolerate black pepper, measure out 1/2 tablespoon per pound or 500g of pork belly. If following the core AIP diet, skip the pepper. It will still be delicious without.
Curing the Portk Belly
- Place the pork belly on a baking sheet and sprinkle the salt evenly across the belly, on both sides and all the edges.
- If you are adding black pepper or other spices and herbs, add them now.
- Place the pork belly in the freezer bag or ziploc bag. Scrape all the remainder of the salt and other spices into the bag. You need the full 2% of salt!
- Pour the maple syrup into the bag.
- Gently massage the pork belly so that the spices and maple syrup cover the meat.
- Fold the ziploc bag over, gently squeeze out as much air as possible, seal and place on a tray/baking sheet in the fridge.
- Each day, if possible twice a day, turn the meat over and massage it so the juices cover the entire meat.
- We like to place the bag with the pork belly on a rack, over a tray in te fridge. This way the liquid can gather underneath the belly and allows for better coverage over the enitre piece of meat.
What to expect
- The salt will draw moisture from the meat, you will notice quite a lot of liquid in your bag. The salt is then drawn back into the meat cells via osmosis, penetrating deeper and deeper with time.
- After a few days the meat will change color becoming more grey and will become firmer.
Getting ready to cook
- After about 7 or 8 days, your pork belly is cured and ready to be cooked.
- Remove from the ziploc bag and rinse off under fresh water.
- If you used other spices, most will likely wash off. But try to keep some on.
- Pat dry with paper towel and place it on its rack, ready for cooking. If you are cooking several pieces at the same time, a rib rack works well. Don't let the pieces touch.
Cooking the AIP Bacon in the oven
- Set the oven to 250°F (120°C) and let it come up to temperature.
- Place the meat on the rack over a tray into the middle of the oven with a temperature probe if you have one.
- Let the bacon come up to an internal temperature of 150-155°F (65-70°C).
- Remove from oven and allow to rest and cool.
Smoking the AIP bacon on a kettle grill
- If you want to smkoe the belly, it helps to leave it uncovered in the refrigerator for a night, after washing and patting it dry. This helps with smoke absorption.
- Set up your grill for indirect heat at a temperature of 250°F (120°C). The BBQ snake method is a great way to cook for longer time periods at a consistent temperature.
- Add some wood chips or chunks and let it come up to temperature.
- Once your fire is burning clean and has come up to temperature, add the pork belly. Preferrably over a tray that catches all the drippings.
- The meat can lay down flat if you have enough space on the grid, we use a rib rack to stand it up as 3 pieces will not fit any other way.
- Allow the meat to come up to temperature (150-155°F or 65-70°C) then remove from the grill and let it rest and cool down.
Storage
- Slice the bacon as thick as you would like it.
- For best storage, we vacuum seal and freeze the bacon in portions. Date the bags and enjoy your AIP bacon for weeks to come!
Serving
- Fry up and serve as you would any other bacon!


Thank you for the amazing instructions to make AIP bacon! Perfect recipe to get started for beginners.
It looks daunting, but it is so easy to make your own homemade bacon! Hope you enjoy it!